[HAI5016] Supabase, MCP & Copilot

This week, we upgrade our agent project from local-only experiments to a cloud database setup. We will connect GitHub Copilot to Supabase through MCP so you can create tables, inspect data, and update records directly from VS Code. At the end of this class, your project has a proper Postgres backend for data processing, and your agent is ready to remember more than just the current chat.
Disclaimer: This blog provides instructions and resources for the workshop part of my lectures. It is not a replacement for attending class; it may not include some critical steps and the foundational background of the techniques and methodologies used. The information may become outdated over time as I do not update the instructions after class.
Why does our agent need a database?
During today’s class we discussed several use cases for connecting our agent to a database. These cases include:
- session memory
- long-term memory, user preferences
- scraped page storage and change detection
- restaurant menu data
- caching (menu data, FX rates)
Therefore, we will prepare a Postgres database for our agent to use during the project. We will use Supabase, a popular cloud-hosted Postgres provider that offers a free tier and an MCP server for easy integration with GitHub Copilot.
1. Create a free Supabase account and project
- Sign up at supabase.com and create a free account. You can conveniently use your GitHub account for easy authentication.
- Create a new project — name it
HAI5016(or whatever you called it in class)
2. Add the Supabase MCP server to VS Code
2.1 Open the Supabase connect dialog
-
In the Supabase dashboard, click the
Connectbutton for your project Find the connect dialog
 - Click the
MCPbutton in the connection options - Client: select
VS Code -
Do not select
Read-onlybecause we want to allow Copilot to make changes to the database schema and data -
Find and copy the generated JSON snippet
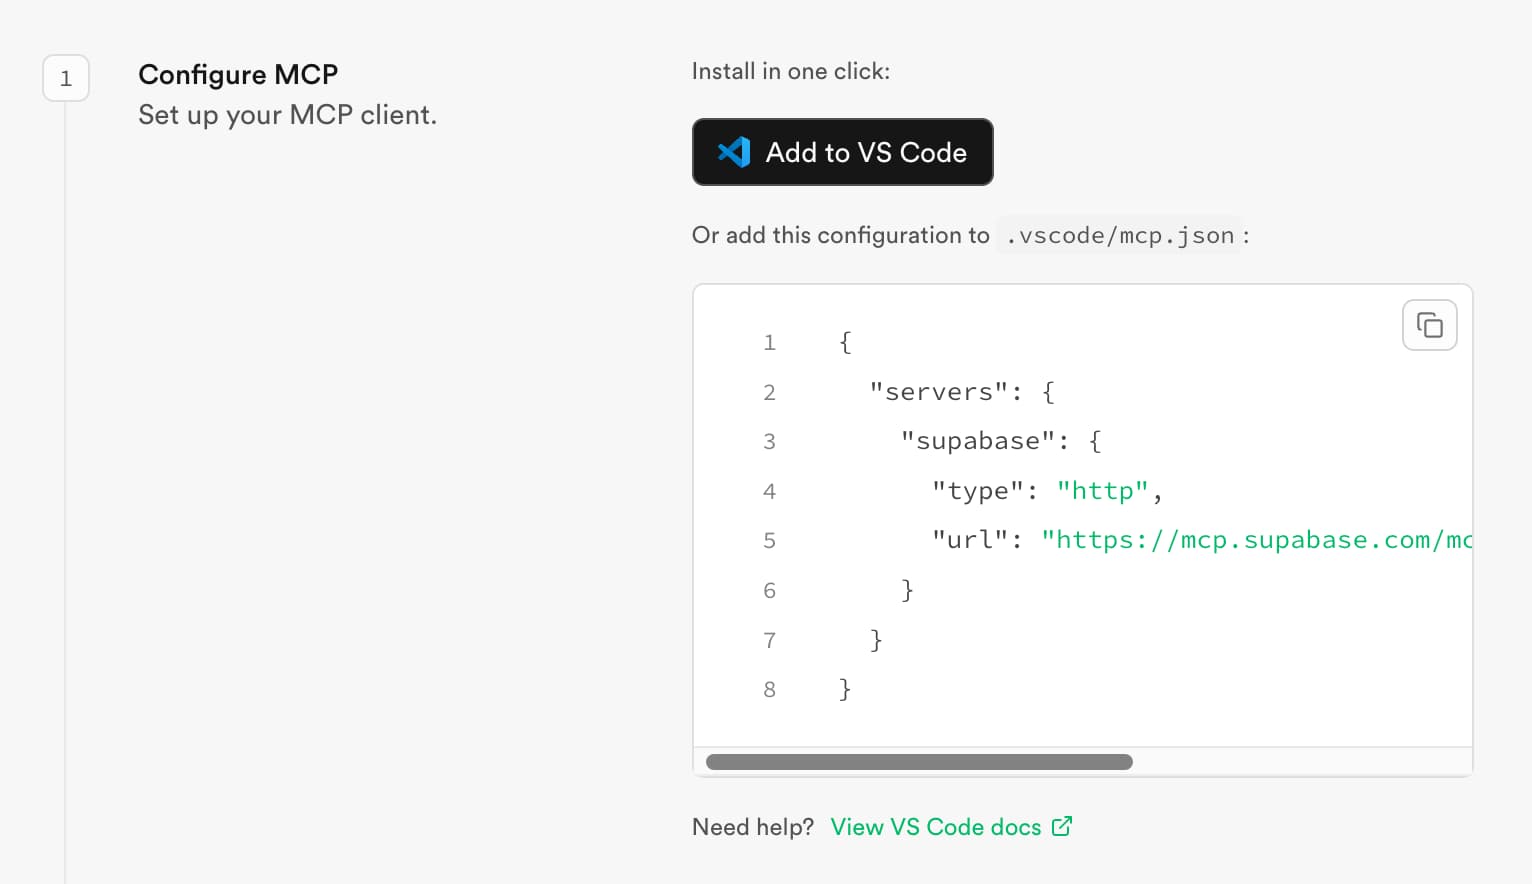 Find the connect dialog
2.2 Create .vscode/mcp.json
To add this MCP server configuration to your project (workspace) in Visual Studio Code, follow these steps:
- Make sure Visual Studio Code is open with your project folder
HAI5016-projectas the workspace - In your repository root, create the file
.vscode/mcp.json - Paste the copied snippet into the file
-
Save the file
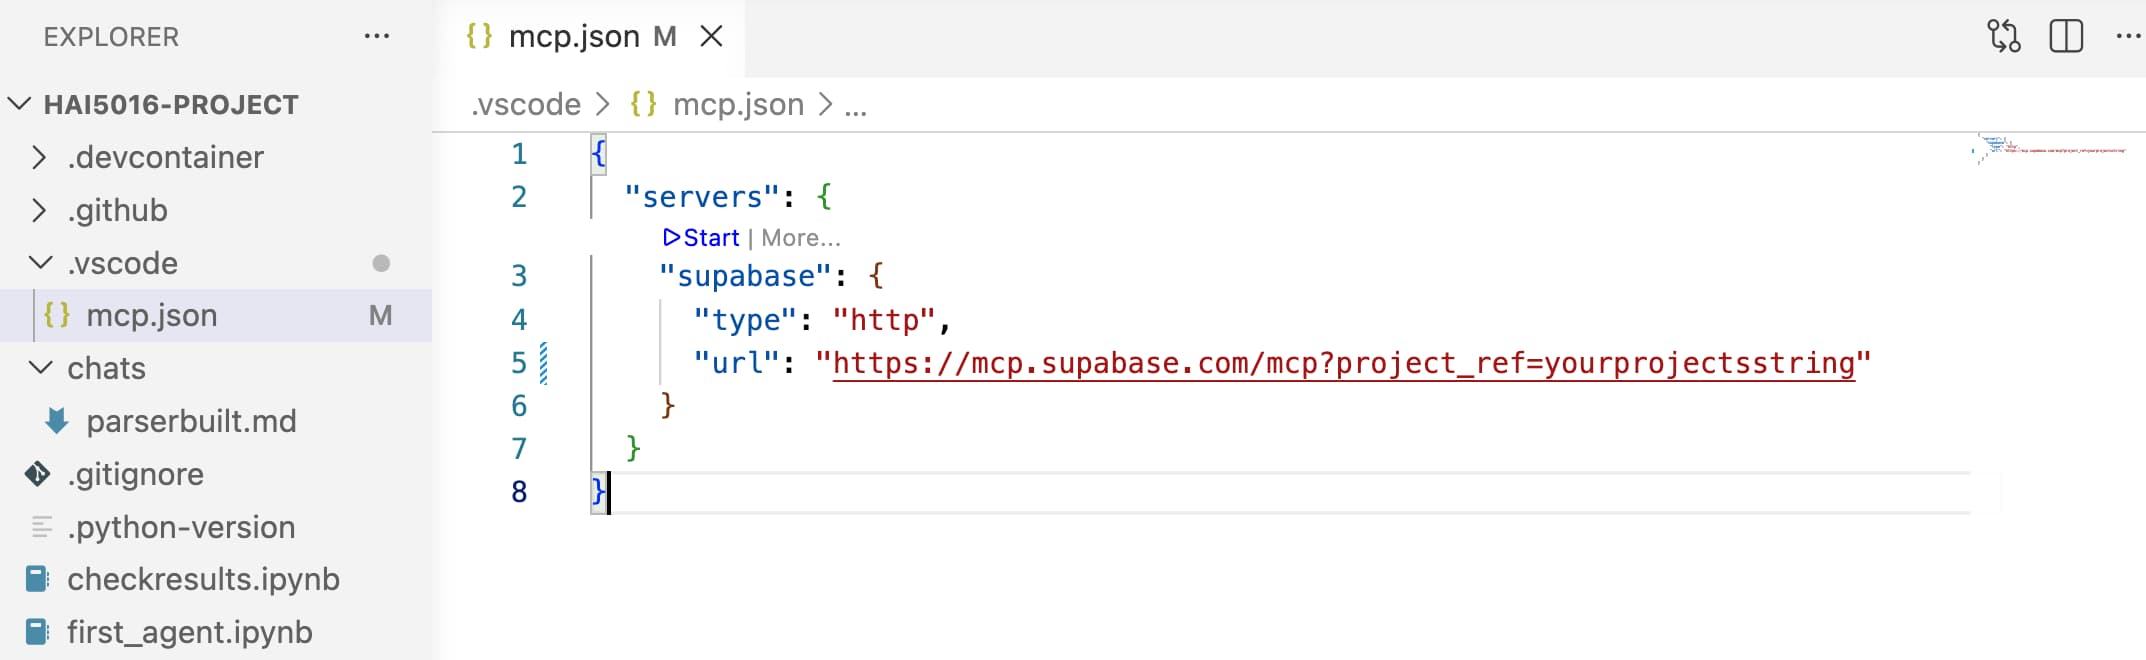 After saving the file, you will notice that a ‘start’ code lens appears above the JSON content
 - Press
start.A dialog like The MCP Server Definition ‘supabase’ wants to authenticate to Supabase MCP (Beta) will appear
-
Click Allow and open the external browser window to complete the authentication flow with Supabase. After clicking
Authorize Visual Studio Codeon the website, click one more time to open Visual Studio Code from the browser window (you may need to switch back to VS Code and clickStartagain after authorizing)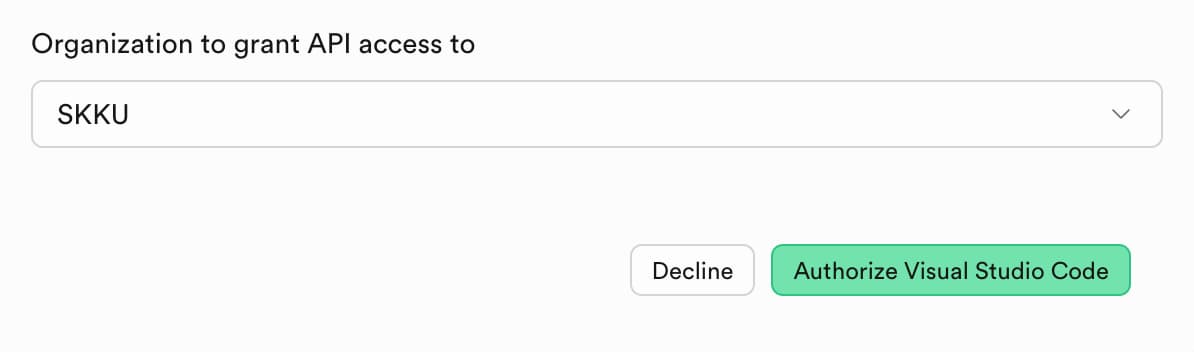 Never read always allow ;)
 - Check if
starthas changed torunningif so, the server is running and connected to Supabase successfully
- Make a commit to your repository so the config travels with the project
2.3 Verify tools are available in Copilot
- Open Copilot Chat and click the Tools button (bottom of the chat panel)
-
Confirm the Supabase tools appear in the list
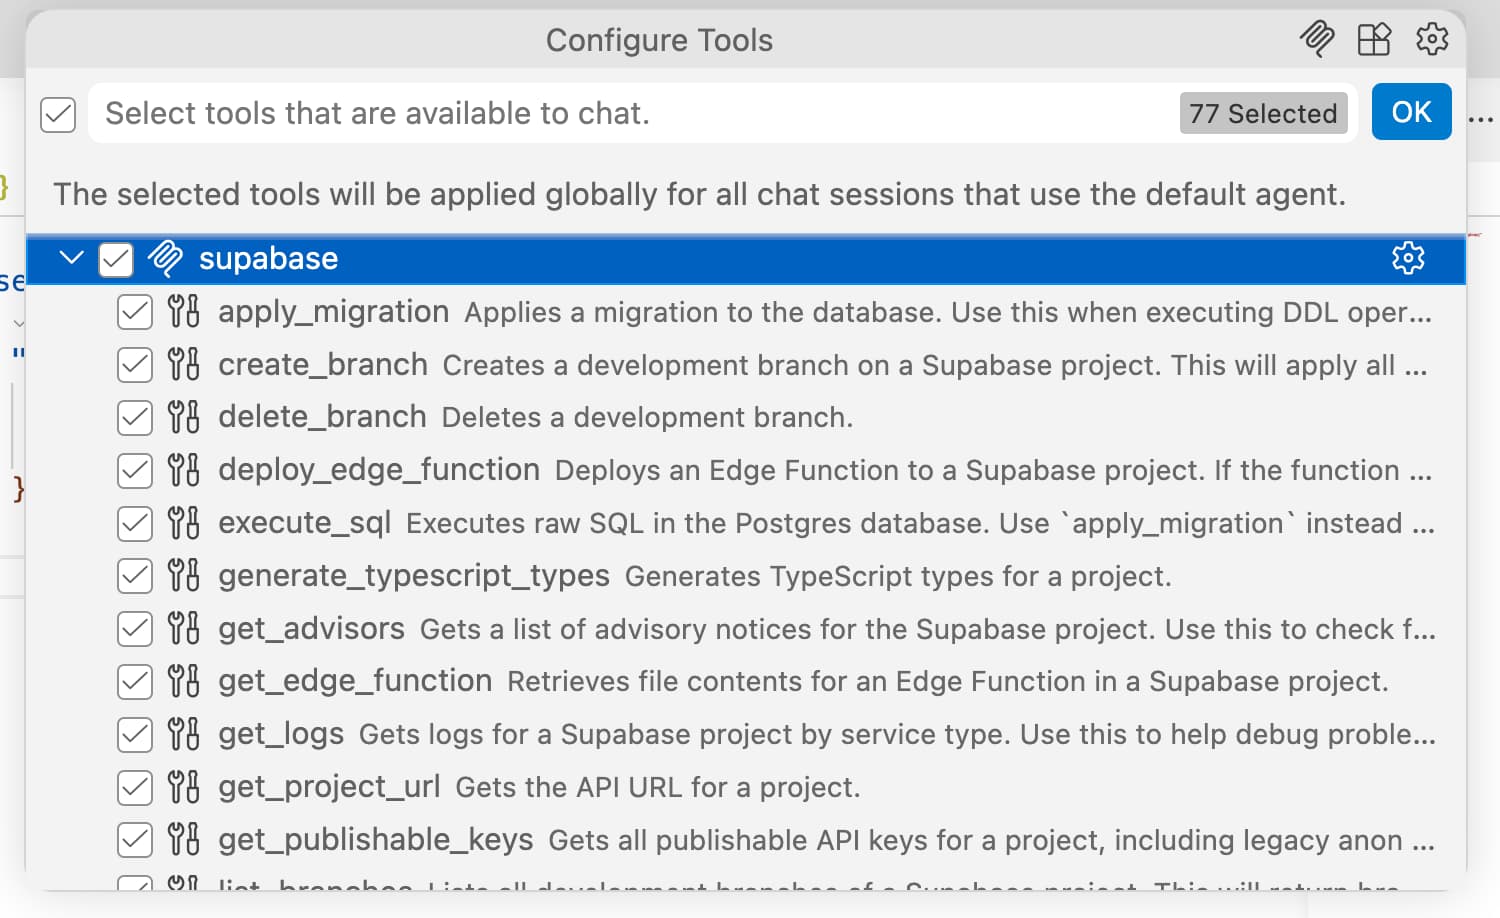 BOOM
BOOM
Great! Now we can use Copilot to interact with our Supabase database directly from our project workspace. In the next sections, we will use Copilot to create tables, insert data, and query the database as part of our agent’s functionality.
3. Use Copilot to create database tables
3.1 User table
- Prompt Copilot to create a
userstable with common fields for an AI agent application - Add your project notebook/context file to the Copilot context before sending the prompt
- Review the fields Copilot created:
id,email,password_hash,display_name,timestamps,preferences,last_login,is_active,profile_image - Verify the table appears in the Supabase Table Editor
3.2 Menu sources table (URL list)
Then, prompt Copilot to create a sources table for storing the list of restaurant menu URLs to scrape, along with metadata about each source. Review the fields Copilot creates and ensure it includes at least: id, url, campus, city, last_scraped_at, is_active. The prompt we used in the class was:
1
2
3
4
5

Our agent scrapes menu items from university campus restaurant sites, and this list is curated by my very diligent students.

Create for this a table in our Supabase database using the Supabase MCP server. Include fields such as team, valid, and last_scraped that we can use. Then, store the following contents in the table:

[copy and paste the table contents from our google sheet here]
3.3 Scraped HTML snapshots table
- Prompt Copilot to create a table for storing daily scraped HTML, including a field to detect if a page has changed since the last scrape
- Review the fields:
id,source_id(FK to sources table),scraped_at,html_content,content_hash,http_status,redirect_url - Note: Copilot may add advanced fields (e.g. redirect detection) that are out of scope — keep what you need, remove the rest
3.4 FX rates cache table
- Prompt Copilot to create a table for caching daily foreign currency exchange rates
4. Use Copilot to audit and fix existing table data
- Open Copilot Chat with the MCP server active
- Prompt: ask Copilot to scrape each URL in the sources table and verify / update the
campusandcitycolumns - Watch Copilot use the MCP tools to: list tables → read rows → fetch URLs → compare values → update incorrect fields
- Review the output: Copilot reports which rows were corrected and flags rows where evidence was inconclusive
- Note: Copilot will warn about Row Level Security (RLS) not being enabled — for now, we can ignore this warning
5. Visualize data in Supabase dashboard
- Open the Supabase dashboard and navigate to the Table Editor
- In the left side panel, click on the
Databases - Under
Database ManagementselectSchema Visualizer -
Now would you look at that
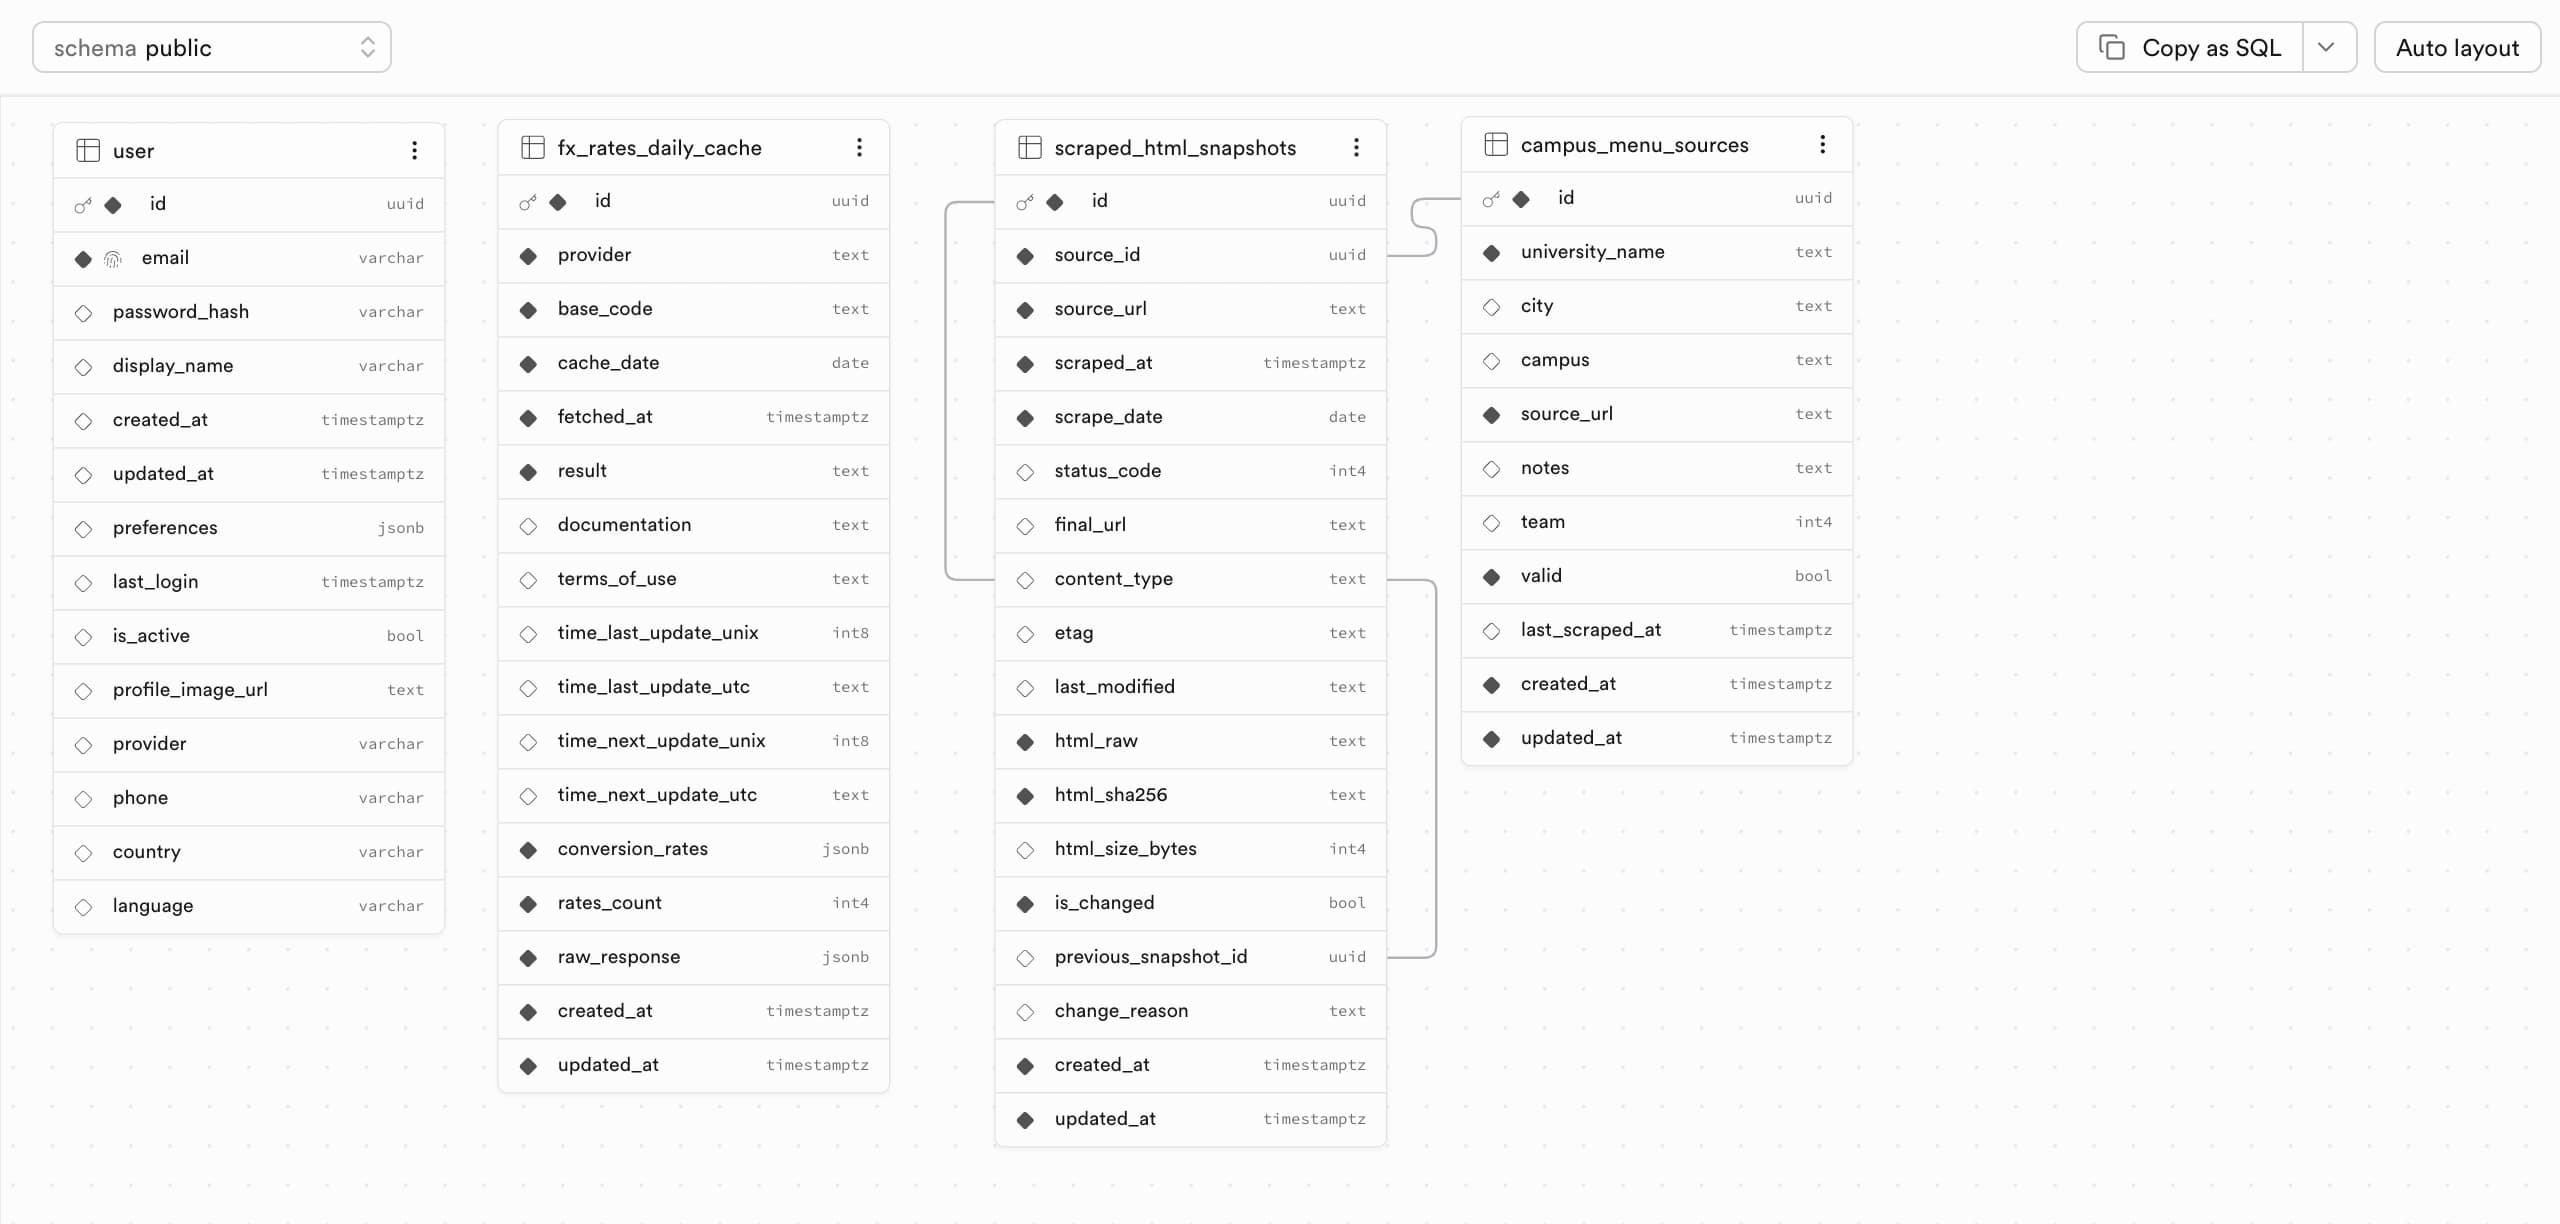 Look at what you’ve just created!
In case you missed class and want to directly establish the tables into your project, you can find the SQL statements in our repo under supabase/create_tables.sql. You can run these statements in the Supabase SQL editor to set up the tables without using Copilot.
References
Supabase
Visual Studio Code