[HAI5014] Run Open WebUI locally
Previously we launched Open WebUI in GitHub Codespaces, connecting it to Google’s Gemini API for LLM inference and Supabase for database storage.
While this approach offers a quick, cloud-based setup—ideal for getting started without configuring your own environment, the 2- and 4-core machines on GitHub can be slow and come with some limitations, such as restricted access to external APIs and GitHub Copilot’s agent mode.
Thus, I would like to suggest alternatives for running Open WebUI on your own (local) system. There are several ways to do this, including using a Python virtual environment, a Dev Container, or Docker Compose. They are extensively described in Open WebUI’s Quick Start Guide. Below we will explore some of these local installation methods.
We will go through the following steps:
- Install git on your system
- Install Visual Studio Code on your system
- Clone our class repository to your local machine
- Run Open WebUI locally using
- Method 1: Dev Containers (Docker)
- Method 2: Python Virtual Environment (uv)
Prepare your environment variables
Before we get into the installation steps, make sure you have the following environment variables (keys) ready.
- Your Gemini API key. You can find your API key in the Google AI Studio or create a new one
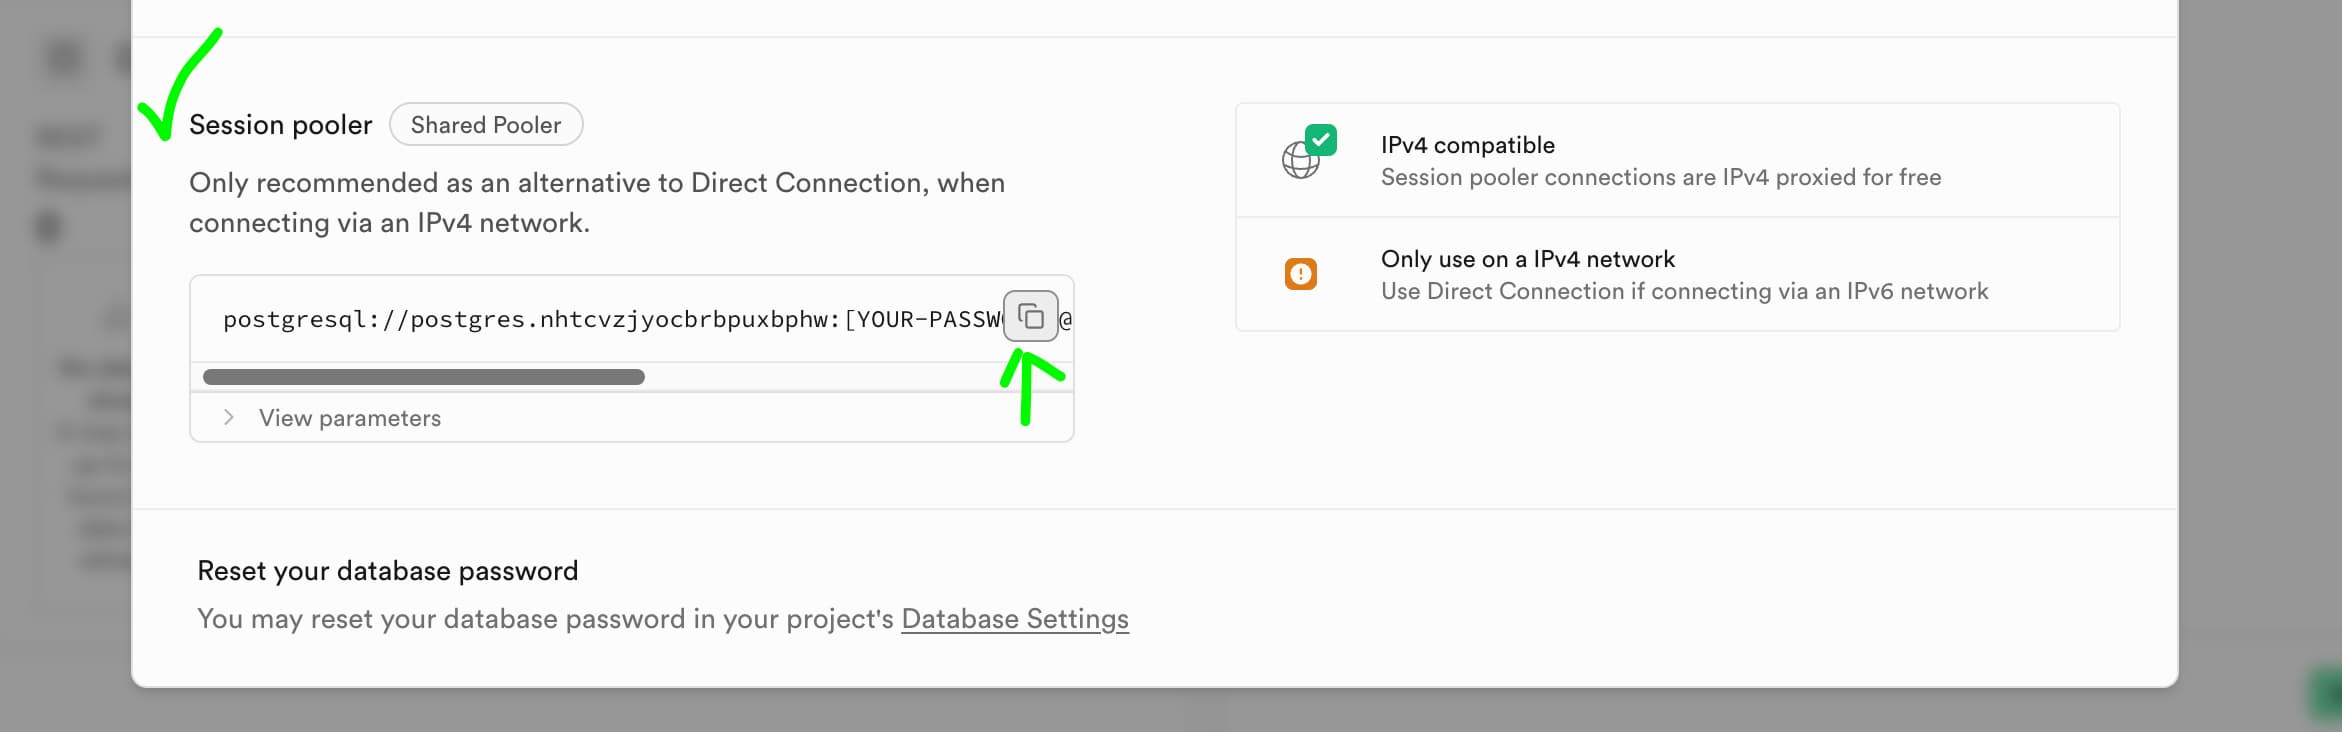
- Your Supabase database connection string. You can find your connection string in the Supabase dashboard. Click the
connectbutton and find theSession poolerconnection string. Replace the[YOUR-PASSWORD]part with your database password:
Install git
In order to clone and push your repositories to GitHub, you need to have git installed on your system. You can check if you have git installed by running the following command in your terminal:
1
git --version
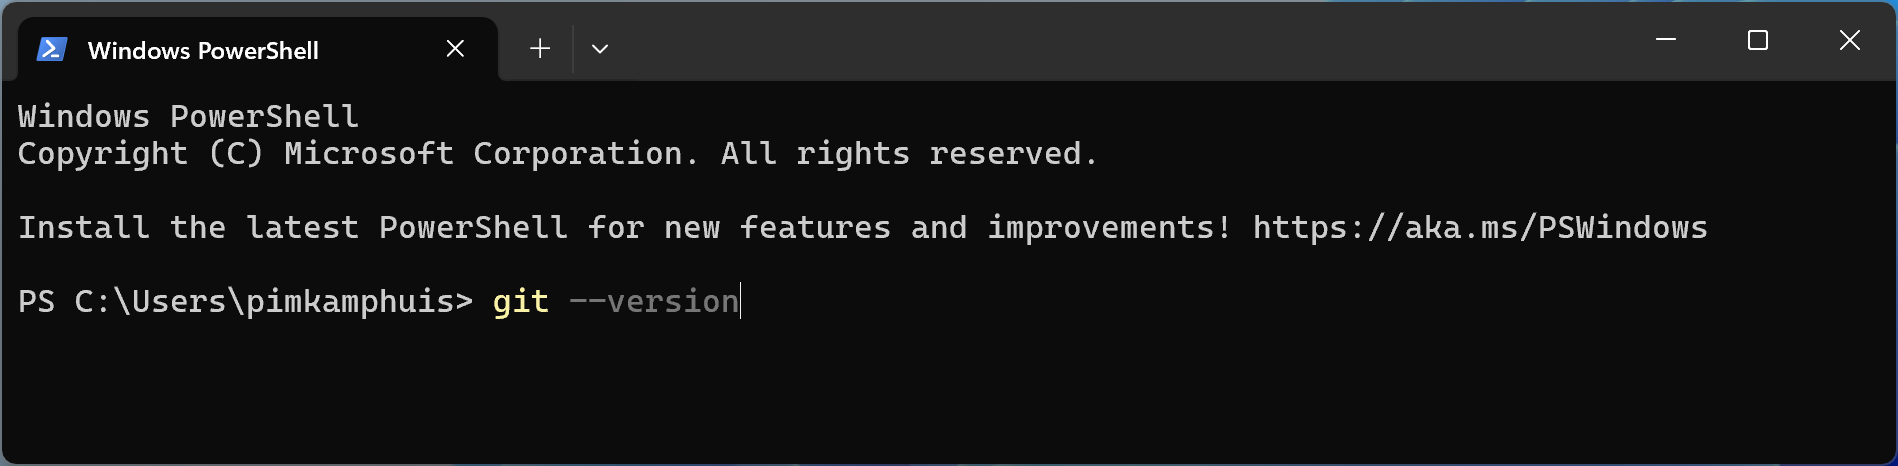
If you see a version number, you have git installed. If not, you can install it by following the instructions below:
On macOS/Linux: recent versions of macOS will show a pop-up asking if you want to install the command line tools. If you don’t see this pop-up, you can install it by running
xcode-select --installin your terminal.On Windows: If Git is not installed, you can run the following in the terminal to install it:
winget install --id Git.Git -e --source winget
Set up your git credentials
After installing Git for the first time, you’ll need to let the system know who you are and set up your git credentials. You can do this by running the following commands in your terminal (replace the email and name with your own):
1
2
git config --global user.name "Your Name"
git config --global user.email "your.email@example.com"
This information will be used to identify you as the author of the commit (version changes) that you make in your repositories, so it doesn’t have to be your real name or SKKU related email address.
Install Visual Studio Code
You are probably already familiar with Visual Studio Code, since it’s the same editor as we used in GitHub Codespaces. If you don’t have it installed yet, you can download it from the Visual Studio Code website.
Clone the repository
To clone the class repository to your local machine, open Visual Studio Code and follow these steps:
- Open the Command Palette by pressing
Ctrl + Shift + P(Windows/Linux) orCmd + Shift + P(macOS). - Type “Git: Clone” and select the “Git: Clone” command.
- Enter the repository URL:
https://github.com/PimOps/hai50154-openwebui.git - Choose a local folder to clone the repository into
- After cloning, Visual Studio Code will prompt you to open the cloned repository. Click “Open” to open the repository in Visual Studio Code. If you don’t see this prompt, you can open the repository manually by going to
File > Open Folderand selecting the folder where you cloned the repository in
After opening the folder, you may see a pop-up asking if you want to install the recommended extensions, or if you want to open the repository in a Dev Container. For now, do not select “Reopen in Container” yet. We will do this later, as we need to set up our environment variables first.
Rename the environment variables file and add your secrets
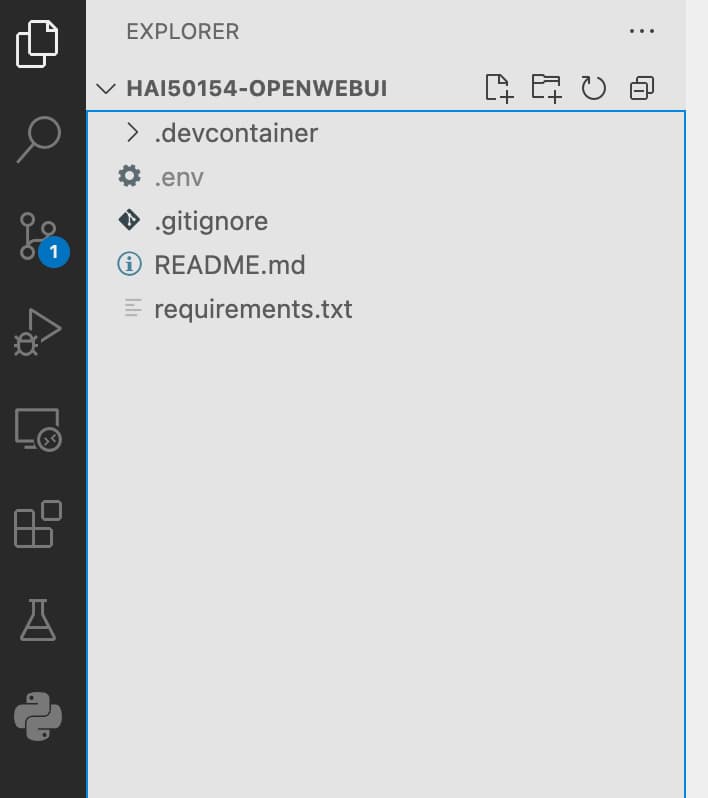
After cloning the repository, you will see a file called .env.example in the root of the repository. This file contains example environment variables and secrets needed to configure our Open WebUI instance.
First, we’ll need to rename this file to .env.
After renaming the file to .env, open the file and add your own secrets to the empty variables in the bottom.
- Right after
OPENAI_API_KEY=you can paste your Gemini API key - Right after
DATABASE_URL=andPGVECTOR_DB_URL=you can paste your Supabase connection string. Replace the[YOUR-PASSWORD]part with your database password
A few notes on the
.envfile:
- Make sure there are no spaces around the
=characters- Make sure to use the correct connection string for your database. Your password should not contain any special characters like
:,/and@because it can confuse the connection string. Also, make sure to remove the square brackets[and]from the password placeholder- The
.envfile is a hidden file, so you may not see it in your systems file explorer- The
.envfile is included in the.gitignorefile, so it won’t be pushed to GitHub. This is important for security reasons, as it now contains sensitive information like your API key and database connection string
Finally, the bottom of your .env file should look something like this:
1
2
3
4
5
6
7
## The OpenAI compatible API key from Google Gemini goes here:
OPENAI_API_KEY=AIzaSyBsdxtf0qEsfdsahhAgJfGcH1ZoFLHznJbFYJHvDw


## The database connection string from Superbase goes here twice:
DATABASE_URL=postgresql://postgres.arandomstring:YOURPASSWORD@aws-0-ap-northeast-2.pooler.supabase.com:5432/postgres
PGVECTOR_DB_URL=postgresql://postgres.arandomstring:YOURPASSWORD@aws-0-ap-northeast-2.pooler.supabase.com:5432/postgres
From here, we can pick one of the two methods described below to run Open WebUI locally. The first method is using Dev Containers, which requires Docker to be installed on your system. The second method is using a Python virtual environment, which does not require Docker but may take longer to set up.
Method 1: Using Dev Containers (needs Docker)
As we have experienced previous classes, GitHub Codespaces is a great way to run our Python projects in a cloud-based environment.
What we basically did in Codespaces was to run our scripts in a container on the GitHub servers. This is a great way to run projects without having to worry about installing dependencies or configuring our local machine (laptop). This approach —developing and running code in a container— is called using Dev Containers. We can also run these containers locally on our machines.
Dev Containers are a way to develop and run applications in isolated environments using Docker. They allow you to run your application in a container that has all the dependencies (libraries) and tools you need, without having to install them separately into your Windows or MacOS system. Some motivations for using Dev Containers are:
- Consistency: Dev Containers ensure that your development environment is consistent across different machines. In class, that means that everyone will have the same versions and tools ready, so that we are all on the same page. In professional projects this means that you can work on the same project with different team members without worrying about differences in dependencies or configurations.
- Isolation: Dev Containers allow you to run your application in an isolated environment, which can help avoid conflicts with other applications on your system. This is especially useful when working with different versions of libraries or tools.
- Portability: Dev Containers can be easily shared with other developers, making it easy to onboard new team members or share your work with others. This is especially useful when working on open-source projects or collaborating with other developers.
- Easy setup: Dev Containers can be easily set up using a configuration file, which makes it easy to get started with a new project. This is especially useful when working on projects with complex dependencies or configurations.
- Integration with Visual Studio Code: Dev Containers are fully integrated with Visual Studio Code, which makes it easy to develop and debug your application.
However, you need to have Docker installed on your system in order to run Dev Containers. For some older machines, this may not be possible due to hardware limitations (Not enough memory or computing power). In that case, you can use a Python virtual environment method instead.
The configuration, settings for a Dev Container are stored in a .devcontainer folder in the root of the repository. This folder contains a devcontainer.json where we defined the configuration for our Dev Container.
Install Docker
Docker is a platform that lets you develop, ship, and run applications in isolated containers, avoiding conflicts with other software on your system. When you install Docker Desktop onto your system, you can run Dev Containers just as easily as we do in Codespaces.
You can download and install Docker Desktop from the Docker website.
Install the Dev Containers extension
The Dev Containers extension for Visual Studio Code allows you to develop applications in isolated environments using Docker. It is a great tool for running applications in isolated environments, which can help avoid conflicts with other applications on your system.
You can install the Dev Containers extension from the Visual Studio Code Marketplace.
Open the repository in a Dev Container in Visual Studio Code
If you have the class repository opened in Visual Studio Code:
To open the class repository in a Dev Container, follow these steps:
- Make sure that Docker Desktop is running
- Open the Command Palette by pressing
Ctrl + Shift + P(Windows/Linux) orCmd + Shift + P(macOS). - Type “Dev Containers: Reopen in Container” and select the “Dev Containers: Reopen in Container” command.
- Wait for the Dev Container to build and start. This may take a few minutes, depending on your system and internet connection.
Once the Dev Container is running, you will see a message in the terminal indicating that the server is up and running. You can also check if the container is running and connected by the connection icon in the bottom left corner of Visual Studio Code:
- After all dependencies have been installed into the container, you might have to open a new terminal tab. (Menu -> Terminal -> New). Then, start the Open WebUI server by running the following command in the terminal:
1
  dotenv run open-webui serve
- You can now open your web browser and go to
http://localhost:8080to access Open WebUI.
Method 2: Python Virtual Environment using uv
If you do not cannot or do not want to install Docker on your system, you can ignore the suggestions from Visual Studio Code to install the Dev Conainers extension or to open the repository in a Dev Container. Instead, you can run Open WebUI using a Python virtual environment. This method does not require Docker, but it may take longer to set up and run.
You might delete the
.devcontainerfolder in the root of the repository, as it is not needed for this method and will stop Visual Studio Code from asking you to open the repository in a Dev Container.
Install a Python 3.11 virtual environment with uv
The uv runtime manager ensures seamless Python environment management for applications like Open WebUI. Open the terminal on your local machine and run the following commands:
- On macOS/Linux:
curl -LsSf https://astral.sh/uv/install.sh | sh - On Windows:
powershell -ExecutionPolicy ByPass -c "irm https://astral.sh/uv/install.ps1 | iex"
After the installation, close your current terminal and reopen the terminal in the root of the repository and run the following command to create a new Python virtual environment:
1
uv venv --python 3.11
This command:
- Downloads and uses Python 3.11 (if not already installed)
- Creates a virtual environment for the project in a .venv folder inside your repo
- Activates the virtual environment for your terminal session

Activate the virtual environment
After creating a virtual environment, you need to activate it in the terminal. This will allow us to run Python commands in the terminal that only run within this virtual environment. You can do this by running the following command in the terminal:
- On macOS/Linux:
source .venv/bin/activate - On Windows:
.venv\Scripts\activateThis will activate the virtual environment and allow you to run Python commands within it.
If you get to see an error in PowerShell related to the execution policy, you can run the following command to set the execution policy to
RemoteSignedfor the current user:
And then try again to activate the virtual environment.
Verify the Python environment
Check your active Python version and path:
1
python --version
Install the dependencies
Next, install the required Python libraries listed in requirements.txt needed to run our Open WebUI instance. You can do this by running the following command in the terminal:
1
uv pip install -r requirements.txt
Yes… this will take a while.
Run Open WebUI
Finally, you can run Open WebUI by running the following command in the terminal:
1
uv run --env-file=.env open-webui serve
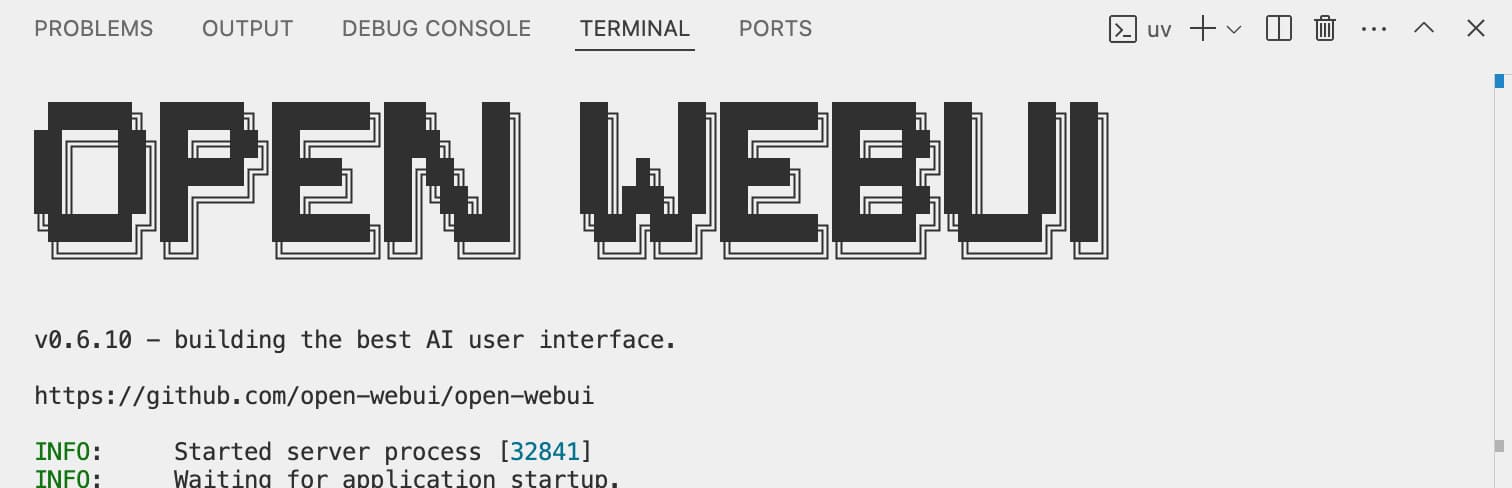
Also this will take a while. But when the server is eventually up and running, you should see this boy passing by in your terminal:
You can now open your web browser and go to http://localhost:8080 to access Open WebUI.
If you did not see the WebUI logo passing by in your terminal, and you do not get to see any webpag via
http://localhost:8080, try to go over the logs in your terminal and look for errors that may prevent the server from starting. If you see any errors, please let me know and I will try to help you out.
Shutting down the server
To shut down your Open WebUI instance, you can simply press Ctrl + C in the terminal where the server is running. This will stop the server and free up the resources used by it.
Also on a Mac, you need to press the control (crtl) key and the C key at the same time. This is a common way to stop a running process in the terminal on most operating systems.